How To Install Zellige Tile - One Room Challenge - Hausmatter Interiors - Week 7

We are just one week from the final reveal, yet I have well over a weeks worth of work to complete - yikes! I can’t believe how much work it has taken just to get to this point. I don’t even want to think about it. BUT, it’s finally starting to look pretty in here, so I’m sure our struggles will be a distant memory once this is over.
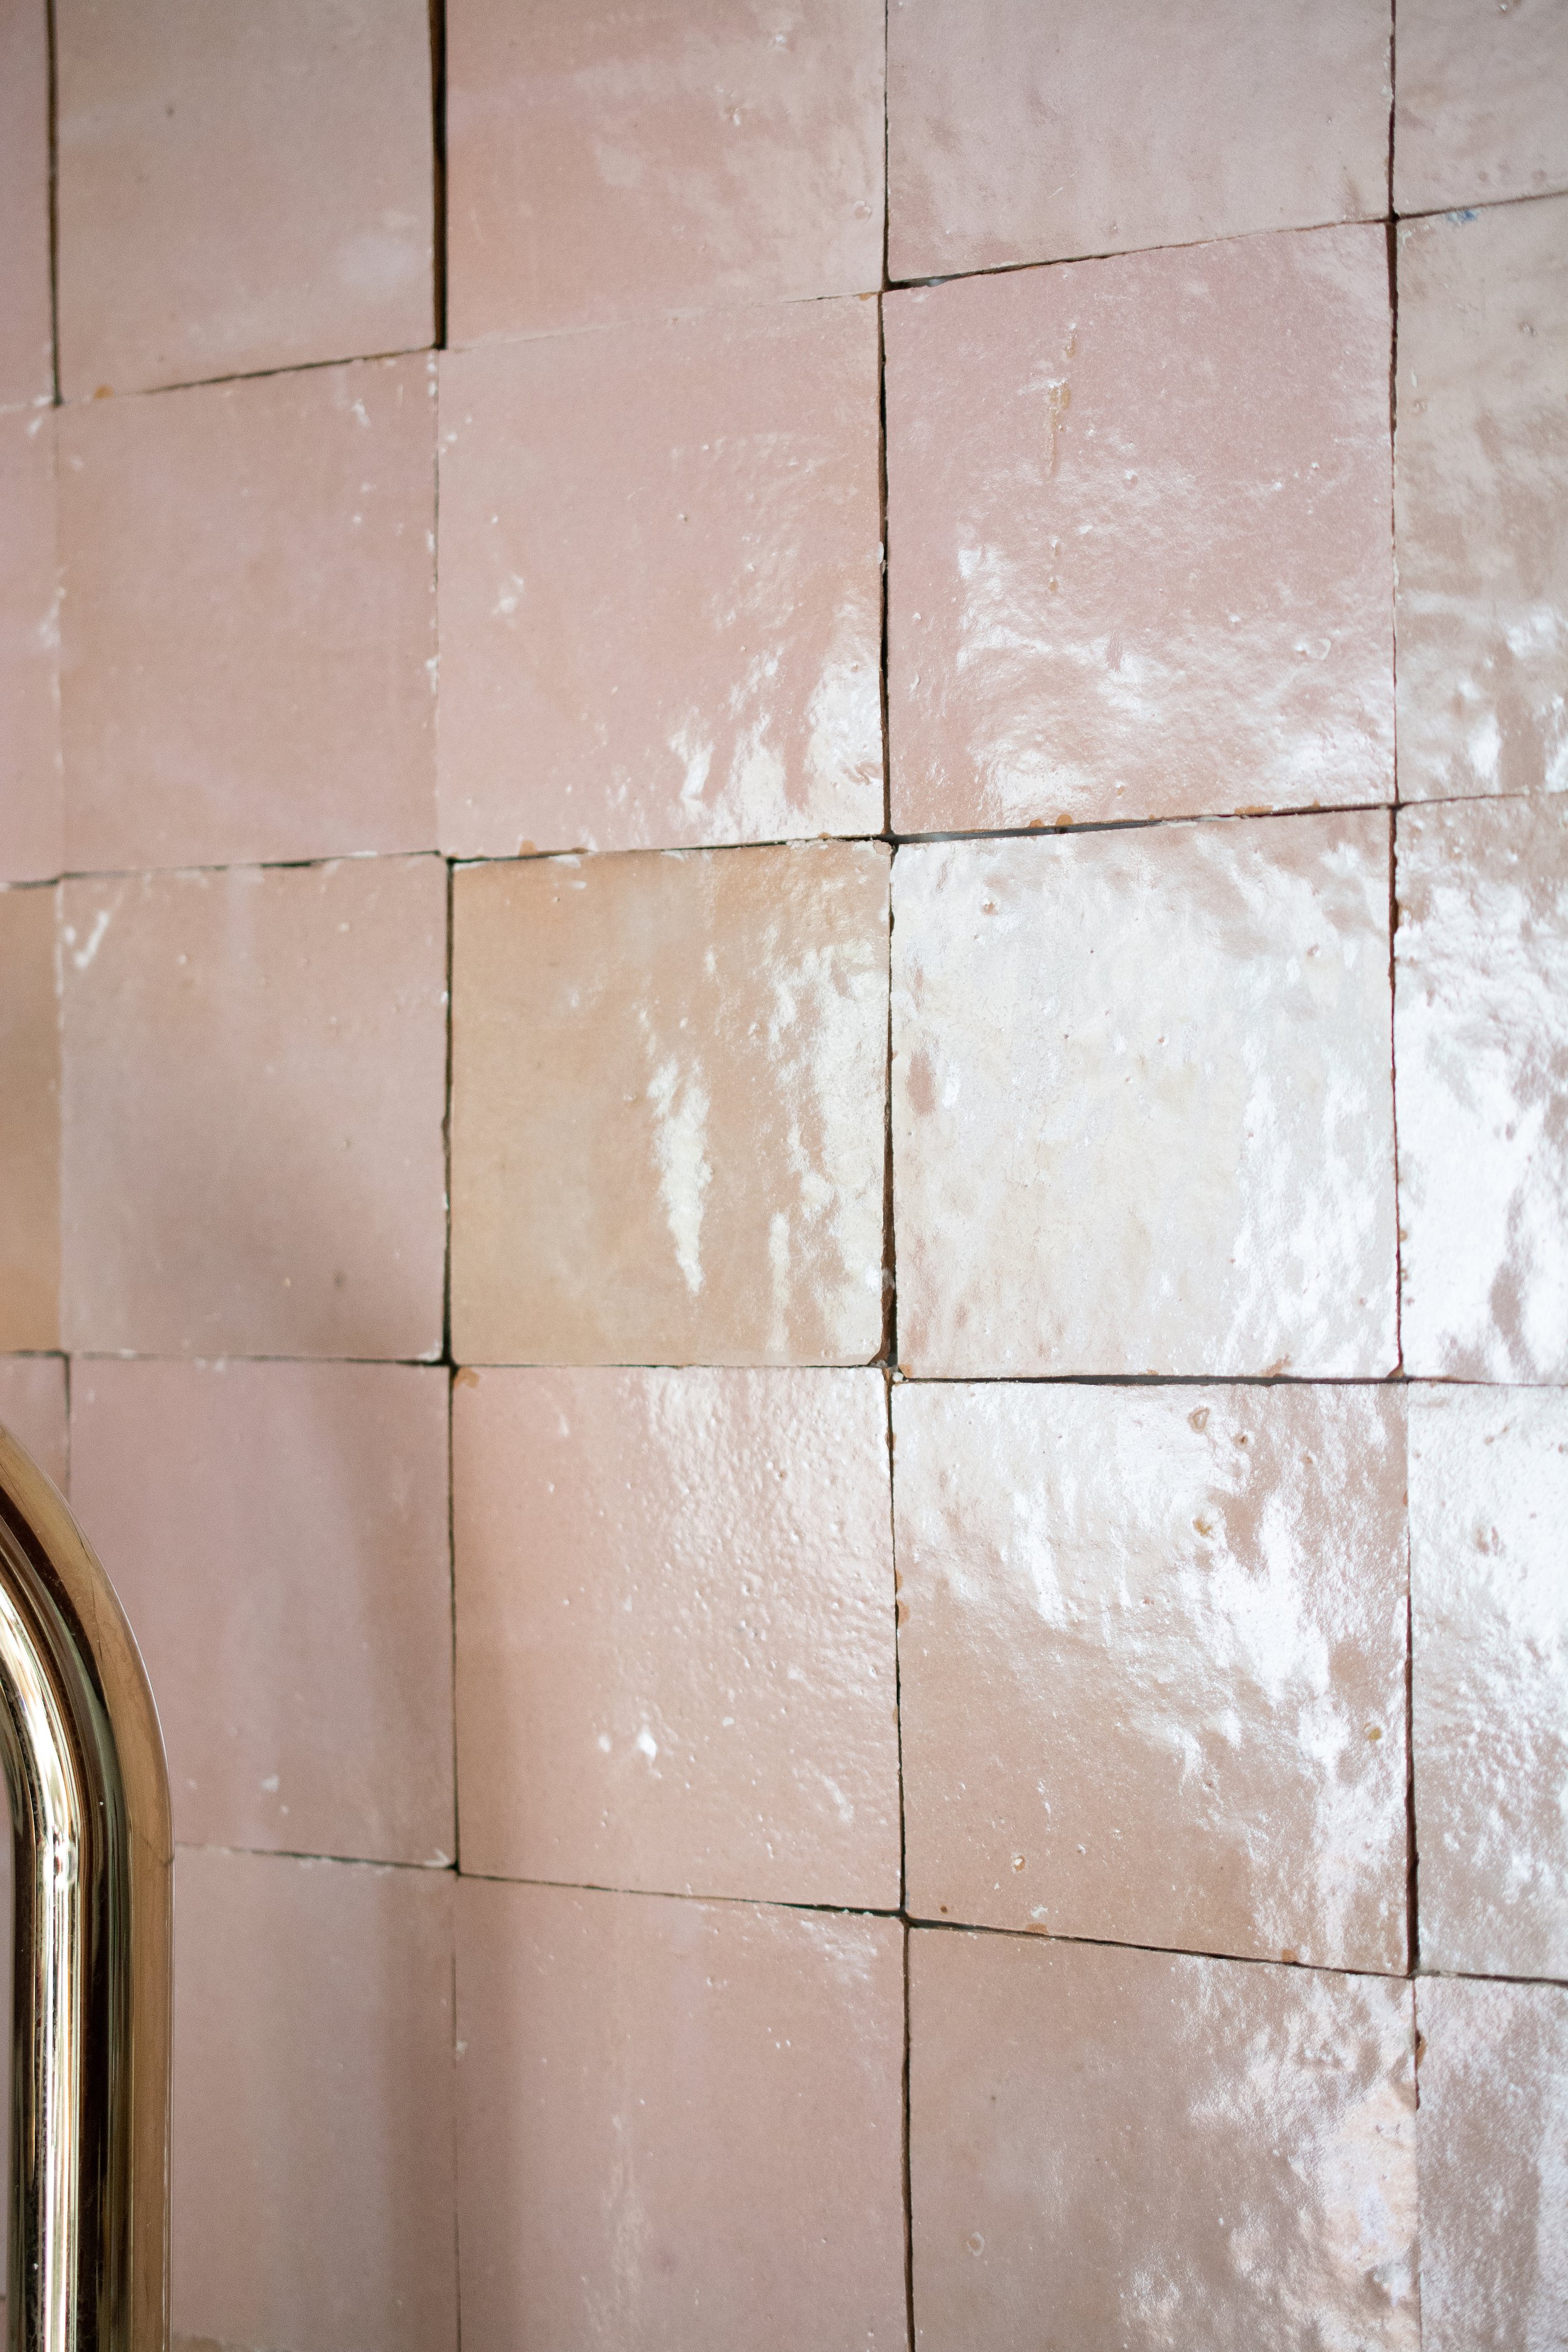
This week, we installed our Zellige tiles from Riad Tile and they are soooooo pretty. Even more so in person. I’m so glad I went with the blush color. It feels sort of neutral with all these earthy tones. No, we are not finished yet, but I couldn’t help from sharing a progress peak! I also wanted to share some things we learned the hard way from the installation process. We actually tiled the entire wall, and then had to take it all back down again because of a simple step we didn’t do. Amnesia, I’m ready for you. LOL
What are Zellige tiles? Zellige tiles are handcrafted in Morocco using natural clay. Although they have become a trend in recent years, it’s a process that’s hundreds of years old. Due to their handmade nature, they have a different installation process than your average tile. Each shape is slightly irregular and there is color variation between them. These are a great choice for someone who does NOT want a manufactured, perfect looking, tile as these will give you more of a rustic, old world look. I decided to install mine without grout as this is how they would traditionally be installed. Since my stove is not on the backsplash wall, I didn’t need to worry about food and things getting splattered on them. If that is an issue for you, you can always grout!

Riad Zellige tile | Hausmatter Interiors
This post contains affiliate links, which means I make a small commission at no extra cost to you. See my full disclosure here.
How to Install Zellige Tiles
Materials needed:
Wet tile saw (don’t be intimidated! These are very easy to use)
The first thing you will want to do upon receiving your tiles, is to inspect them for any unusable pieces that may have broken during shipping. Always make sure to order about 10-15% more than you actually need, because if there aren’t casualties in shipping, there will be in the cutting process! If you have more than one box, you will mix the tiles between the boxes so the color variation is evenly dispersed.

riad tile
2. Soak your tiles for 4 minutes. This releases air from the clay. It’s a fun step!
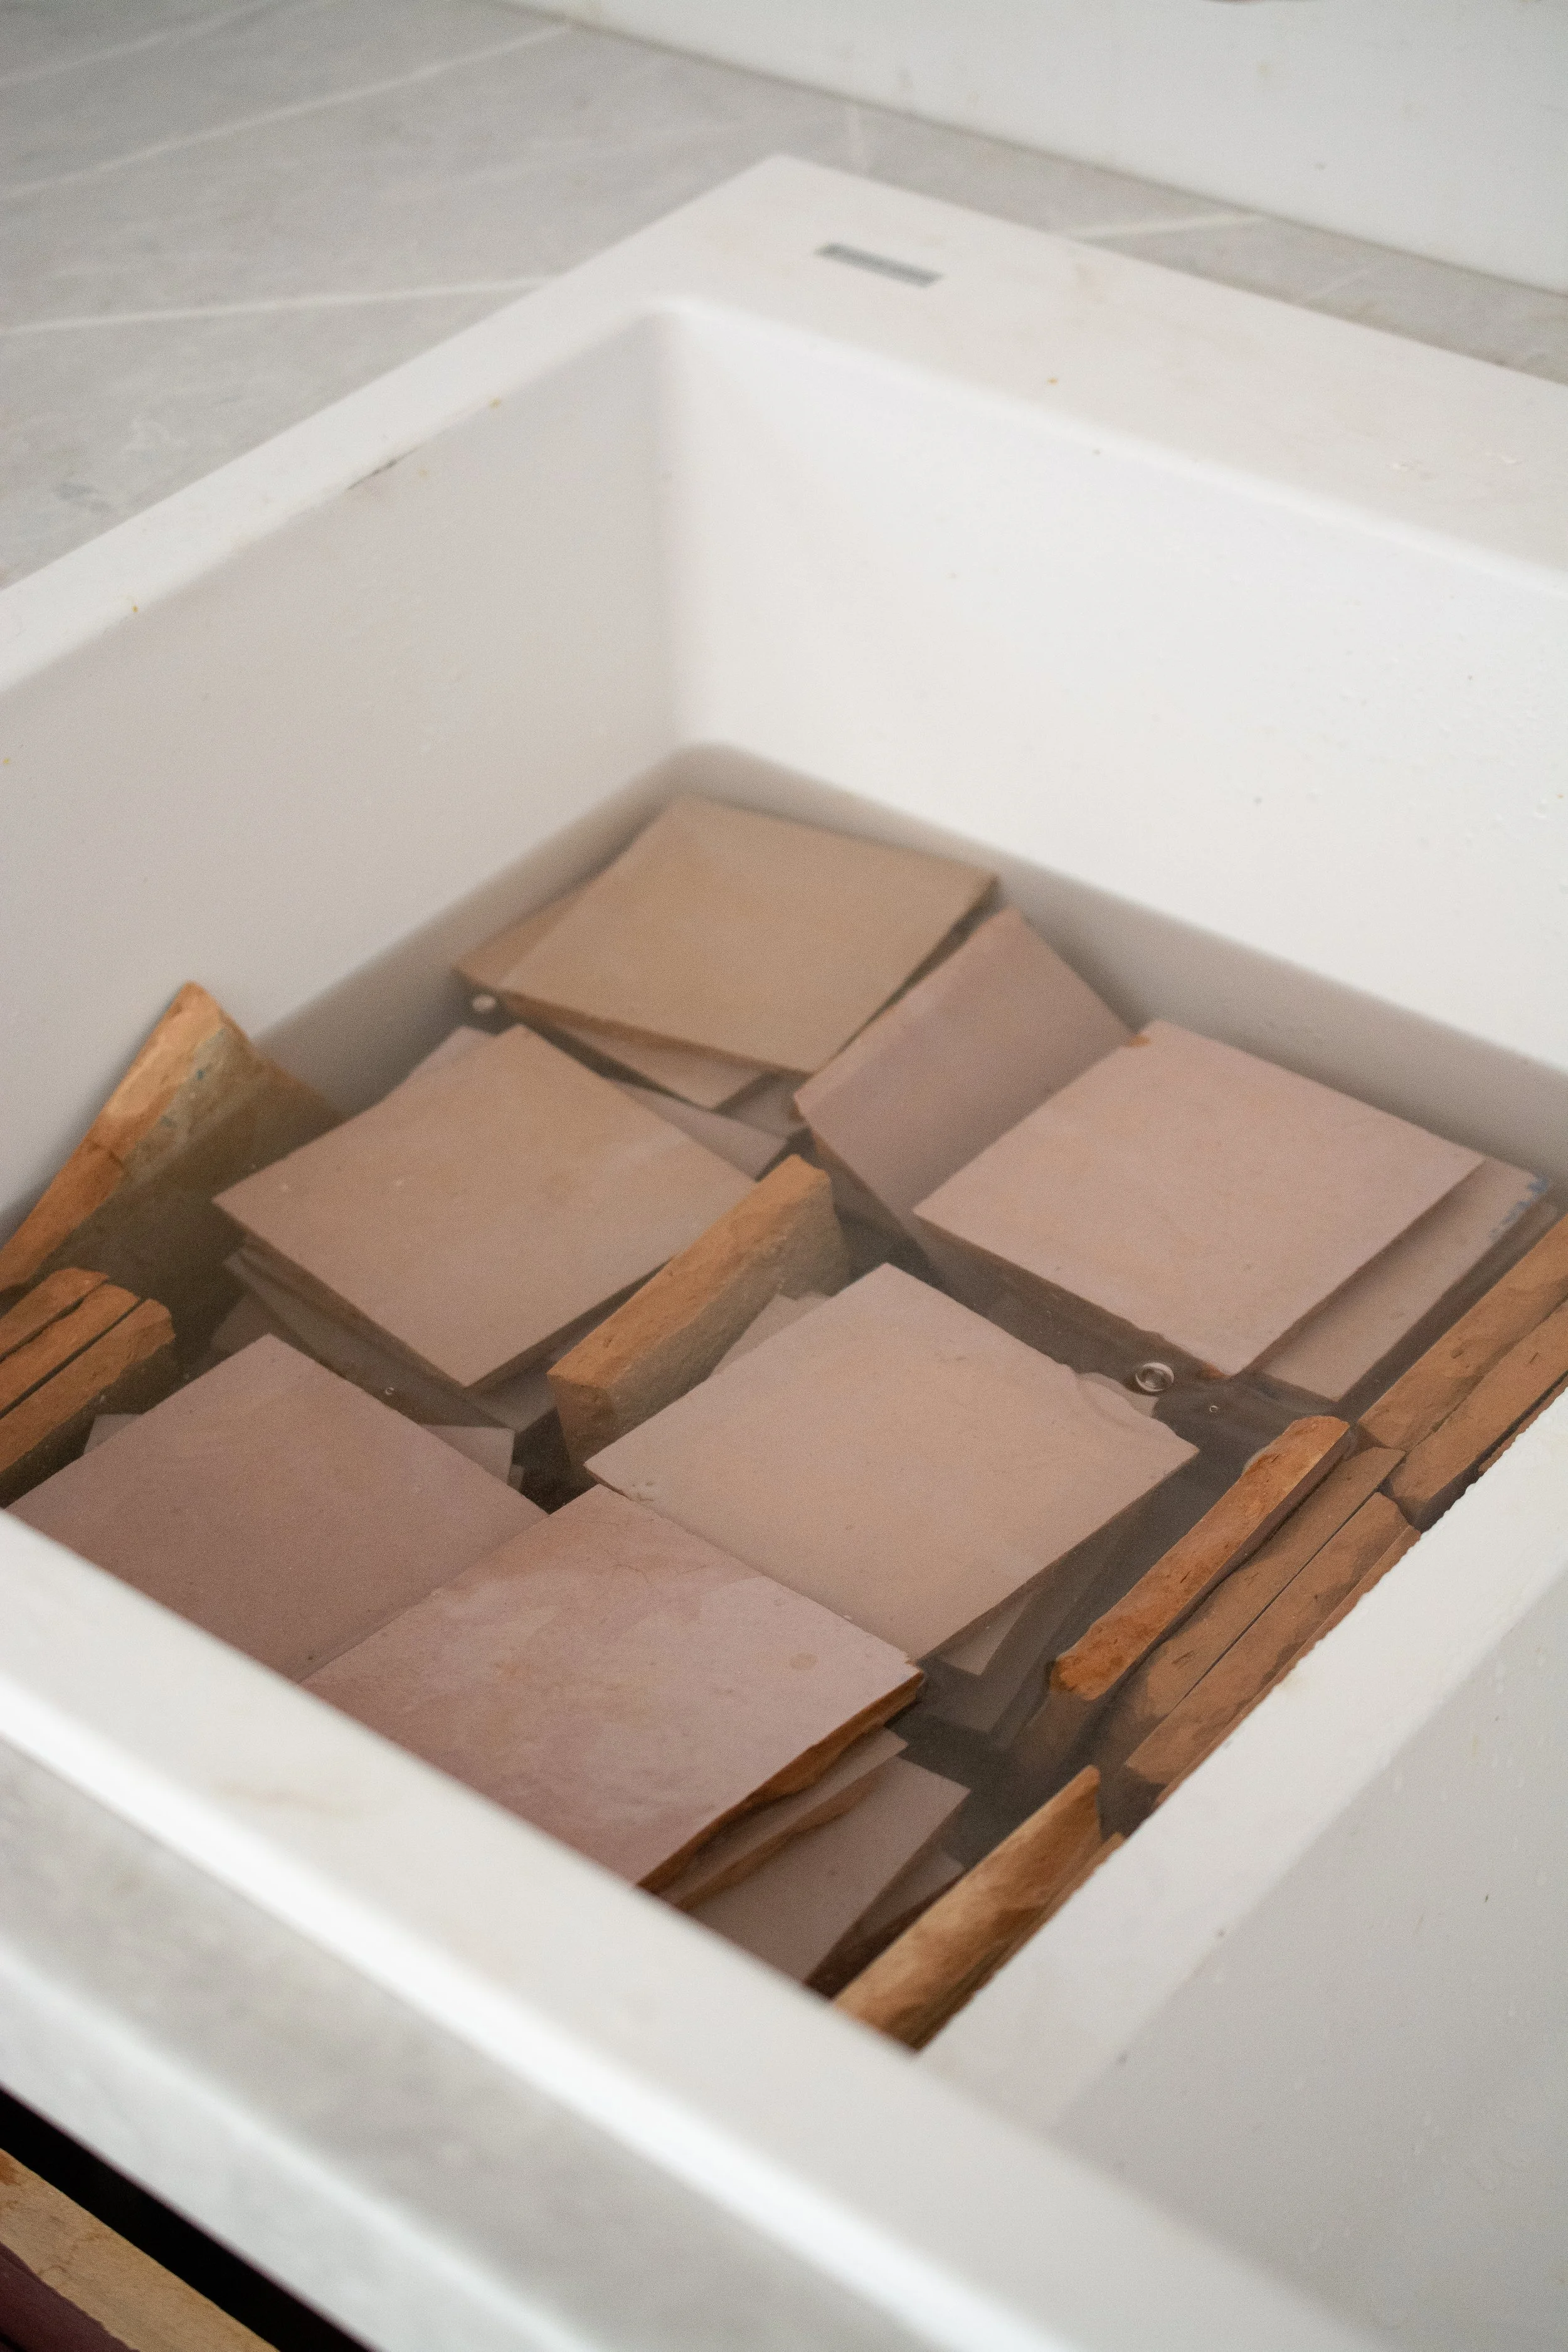
how to install zellige tile
3. Work from the center of your wall, and move out from there. This will ensure any cuts made will be symmetrical. You want to create pyramid sections with your tiles, rather than working in long rows.
Use a laser level to provide you with an even and clear vertical and horizontal line. We did not do this the first time, and it resulted in tiles that were going slightly diagonal! Do not skip this step. Countertops are usually not perfectly level so this will make sure you get it right. Even if your countertops are level, the tiles are not, so you will be allowing cracks to form more so in areas to accommodate for the uneven edges. Align your laser level on the horizontal and vertical orientation and move it up each row. You may need to trim the bottom of some of the tiles on the first row to get things lined up. Try rotating each tile to see which side is the best fit. I’d say this feels more like masonry than tiling. There is a learning curve, but you will get the hang of it!

how to install zellige tile
4. Use the serrated trowel to apply adhesive. You don’t want to put too much on, just a thin layer. You can either apply it directly to each tile, or spread a layer on your wall.

how to install zellige tiles
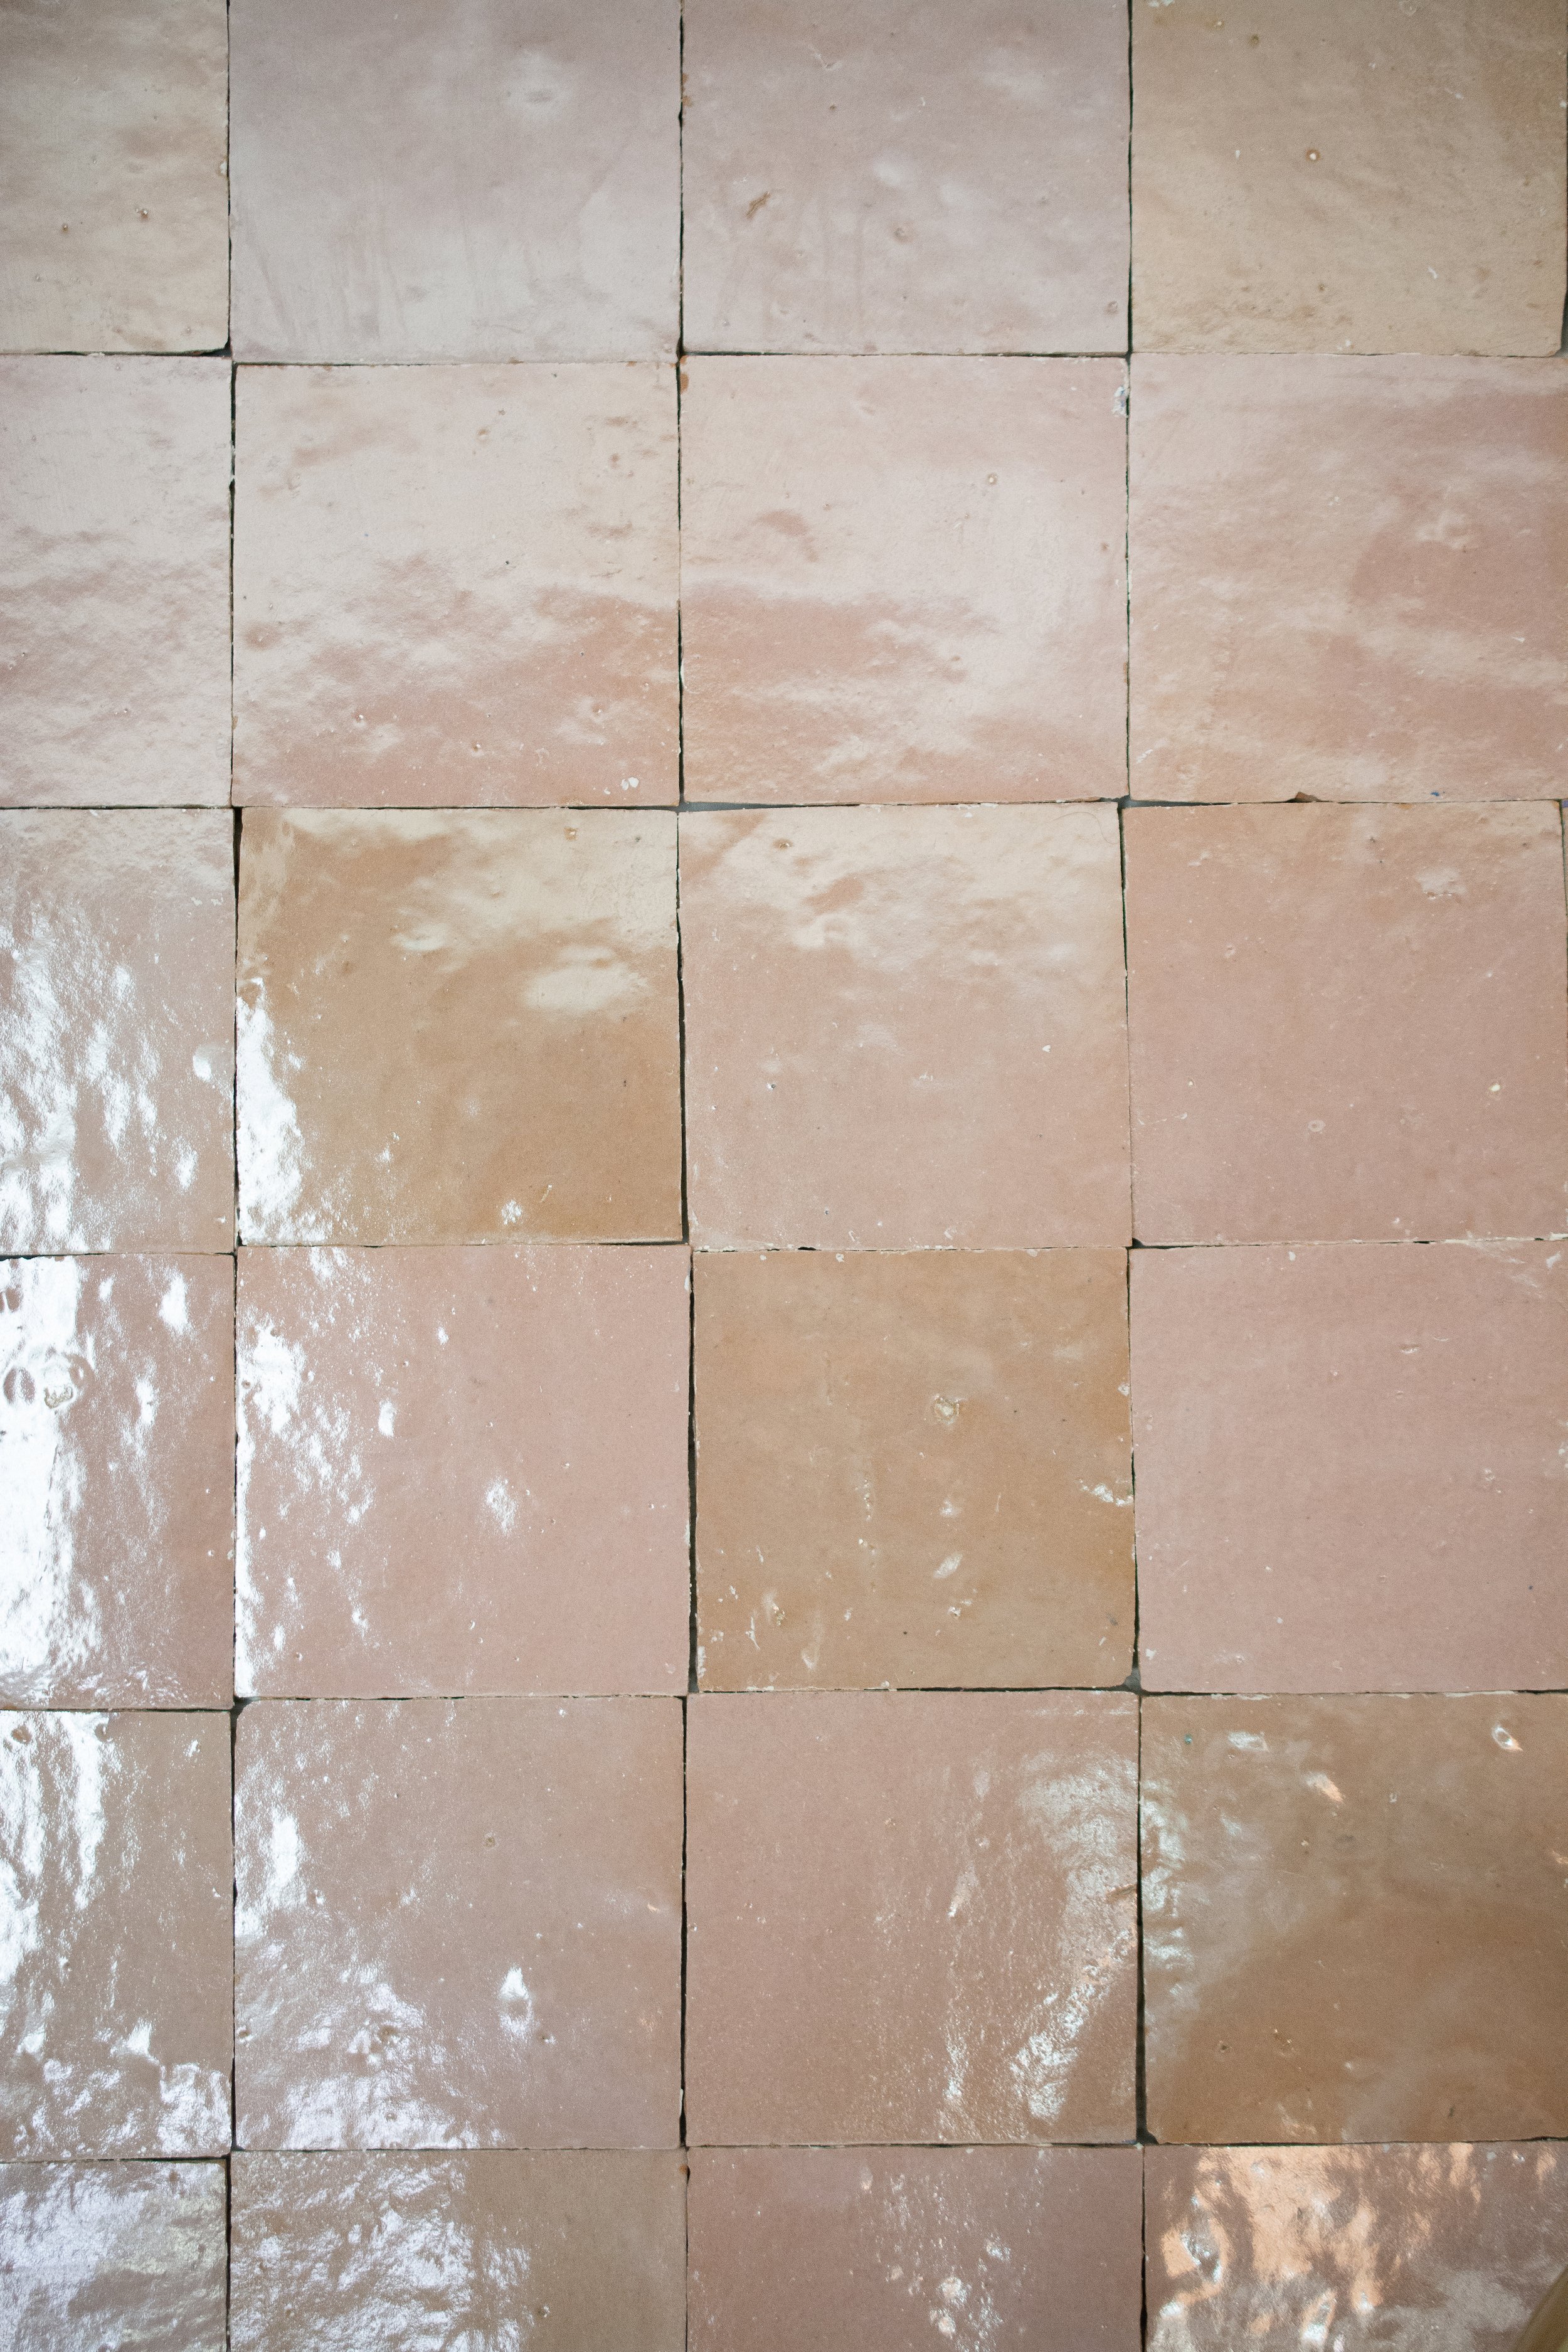
Because each tile is not a perfect square, and some corners may be chipped (not really a defect, but part of the nature of handmade tiles), there will naturally be some gaps between each tile once they’re on the wall. The main thing is to make sure you are installing them in level rows.

how to install zellige tiles
Use your tile saw to cut pieces to fit as needed.

how to install zellige tiles
And you are done! Make sure to use a sponge to wipe away any adhesive that collected on the surface. We made the mistake of waiting, and it was very hard to remove once it dried (this seems obvious but we are not collectively working with one full brain at the moment due to renovation exhaustion)
5. Use receptacle spacers to make your electrical sockets flush with your tile. I liked these because you can snap several together to get the distance just right.

how to make the socket flush with tile
They are added just behind each screw.
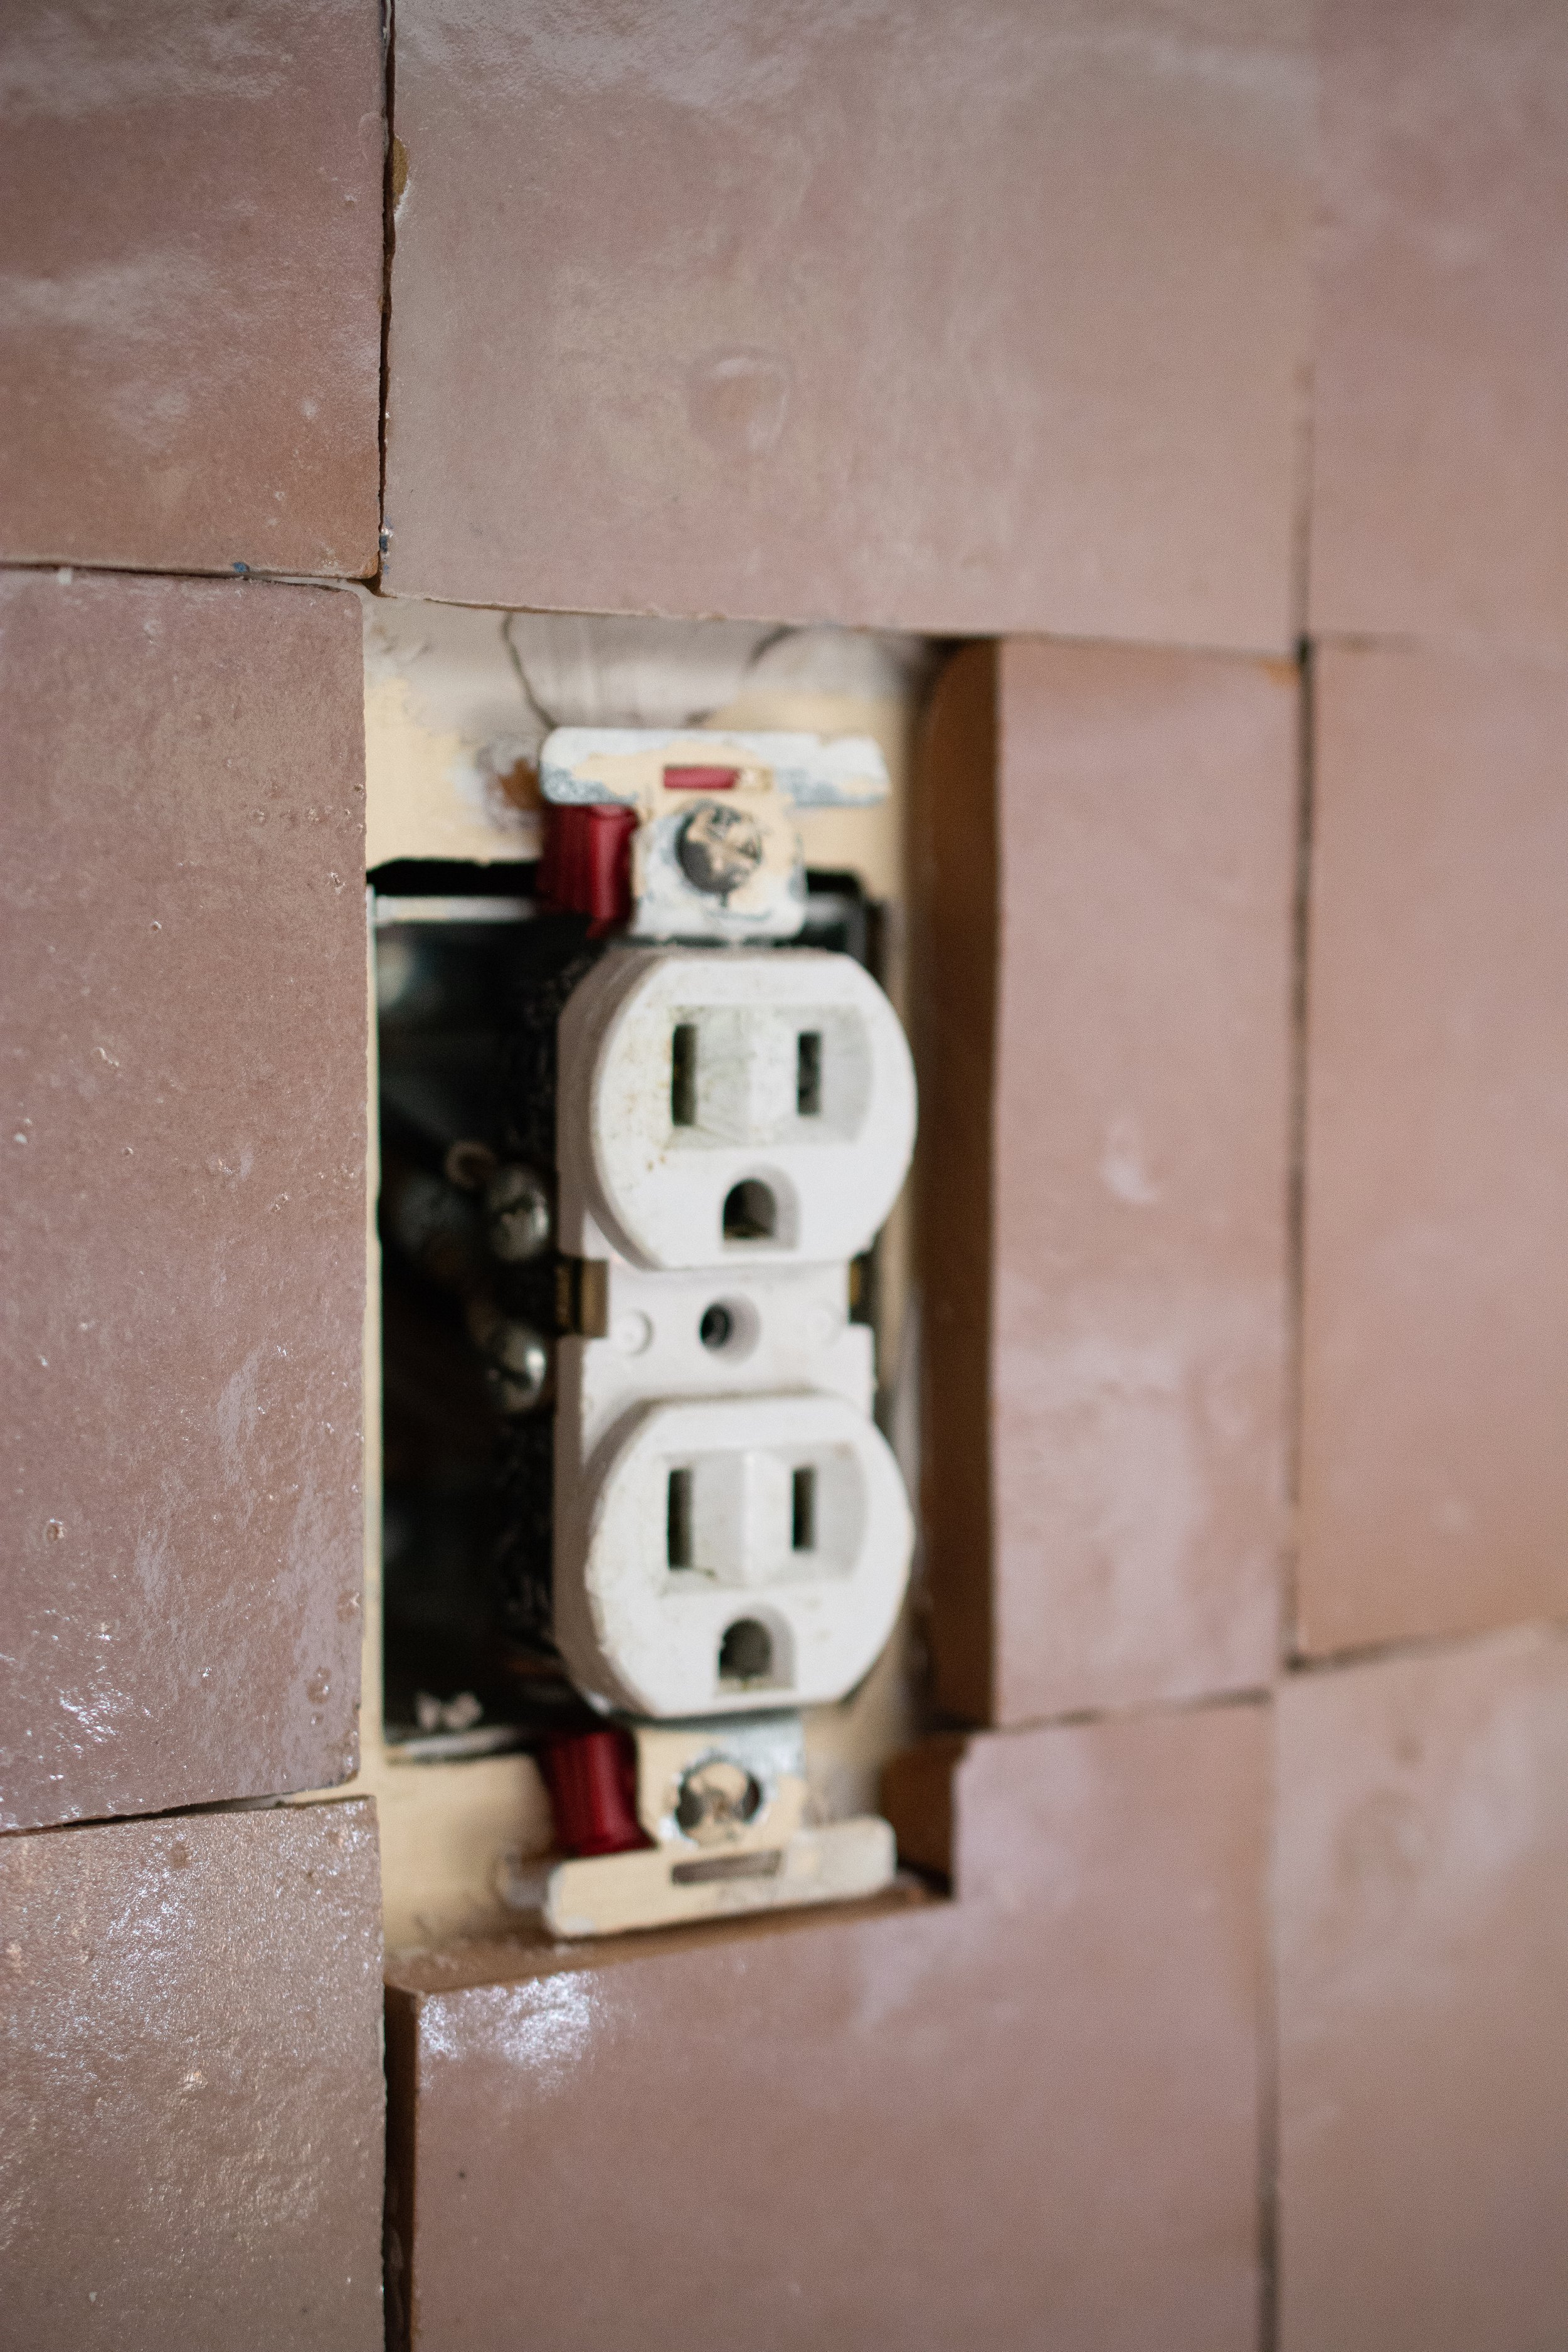
how to make the socket flush with tile.
6. As I mentioned, I did NOT grout my tiles, but you do want to add silicone to the bottom of your tile where it meets your countertop. This will prevent any spills from getting under the cracks.

Now you can enjoy your glossy, gorgeous Zellige tiles!
Left to do:
remove popcorn ceiling
paint walls
install mural
install dining chandelier
paint floor
order table and have plastic cut to protect the top
order chairs or repaint old chairs
order drapes and install
finalize dining room art selection
source styling accessories
check with landlord on countertop replacement
strip cabinets
paint cabinets
fill in old hardware holes
paint new cabinet hardware
install hidden cabinet hinges
make art selections for kitchen
install tile
install kitchen wall sconces
figure out a way to hang the heavy mirror
create art box for range exhaust
customize the shelving unit and place order ASAP
Paint fridge
Order rug and accessories for styling
install art
install new countertop
install new sink and faucet
install wall shelves
Please take a moment to visit my sponsors for this project


